

Monday, August 22, 2011
Noah's First Day of School

Our little boy is now in the second grade. I can't believe it! Where has the time gone? It seems like yesterday...oh wait...yesterday seemed like yesterday.
To look back on what we have been through with Noah, it seems like a blessing Shawn and I are still sane today. Because of Noah's special needs, there have been many days I wondered if I would make it through. Don't get me wrong, I'm not naive enough to believe that all Noah's difficult days are behind him. I do believe that the good Lord is giving Shawn and I a breather right now though.
As Noah's speech progresses, we continue to see the kind and loving heart that Noah has. He speaks ever so softly with an, "I love you momma" and my heart just melts. Noah's social skills are flourishing and his aggression subsiding.
As his first day of school drew near, so did Noah's excitement and curiosity. He understand that he will have a new teacher and make new friends this year. And to our delight, he's excited for his new adventures as a second grader.
We'll see what this year holds for Noah's growth and development. I believe Gods hand in Noah life will continue to make each day a wonderful memory.

Sunday, August 7, 2011
Open Kitchen Shelving
While browsing websites today for decorating ideas I came across an IKEA ad for open shelving.
 |
This picture is from IKEAs homepage. Pretty right!! This is my kitchen now...  First stop...Goodwill. I found these shevles at Goodwill brand new. They cost me $3.38.  I painted the shelves a brilliant white. These needed about 4 coats of paint.  I guess I should have paid a bit more attention to the directions. I screwed the screws too tightly and twice the heads came off. I was so ready to quit.  After much frustration, I finally got them together correctly.    |
DIY Piano Bench into an Ottoman
I absolutely love this ottoman, after my project is complete of course. I bought a wingback chair awhile back and have been looking for an ottoman. The chair is very comfortable, but it definitely needed an ottoman. While in search of the perfect foot stool, I had to keep in mind that the fabric of the chair is pretty loud. I knew the footstool had to be simple. When I saw this piano bench at Goodwill for $5.38 I knew I had found a perfect fit.
 |
| The Before....Not very attractive!! |
 |
| This is going to be great storage for the remote controls and such... |
 |
| After removing the fake leather covering I measured new padding. When measuring for fabric make sure the fabric is a bit larger than the padding. I already had the padding on hand so that did not cost a dime.  |
 |
| And after....It turned out so cute. I painted it a very bright white. I found the fabric at Goodwill today. It was $0.88. I am going to have to cut probably four inches off the legs. It is just a bit too tall for the chair. I am so happy with the finished project.  |
~ Finished product cost $6.26 ~
Friday, August 5, 2011
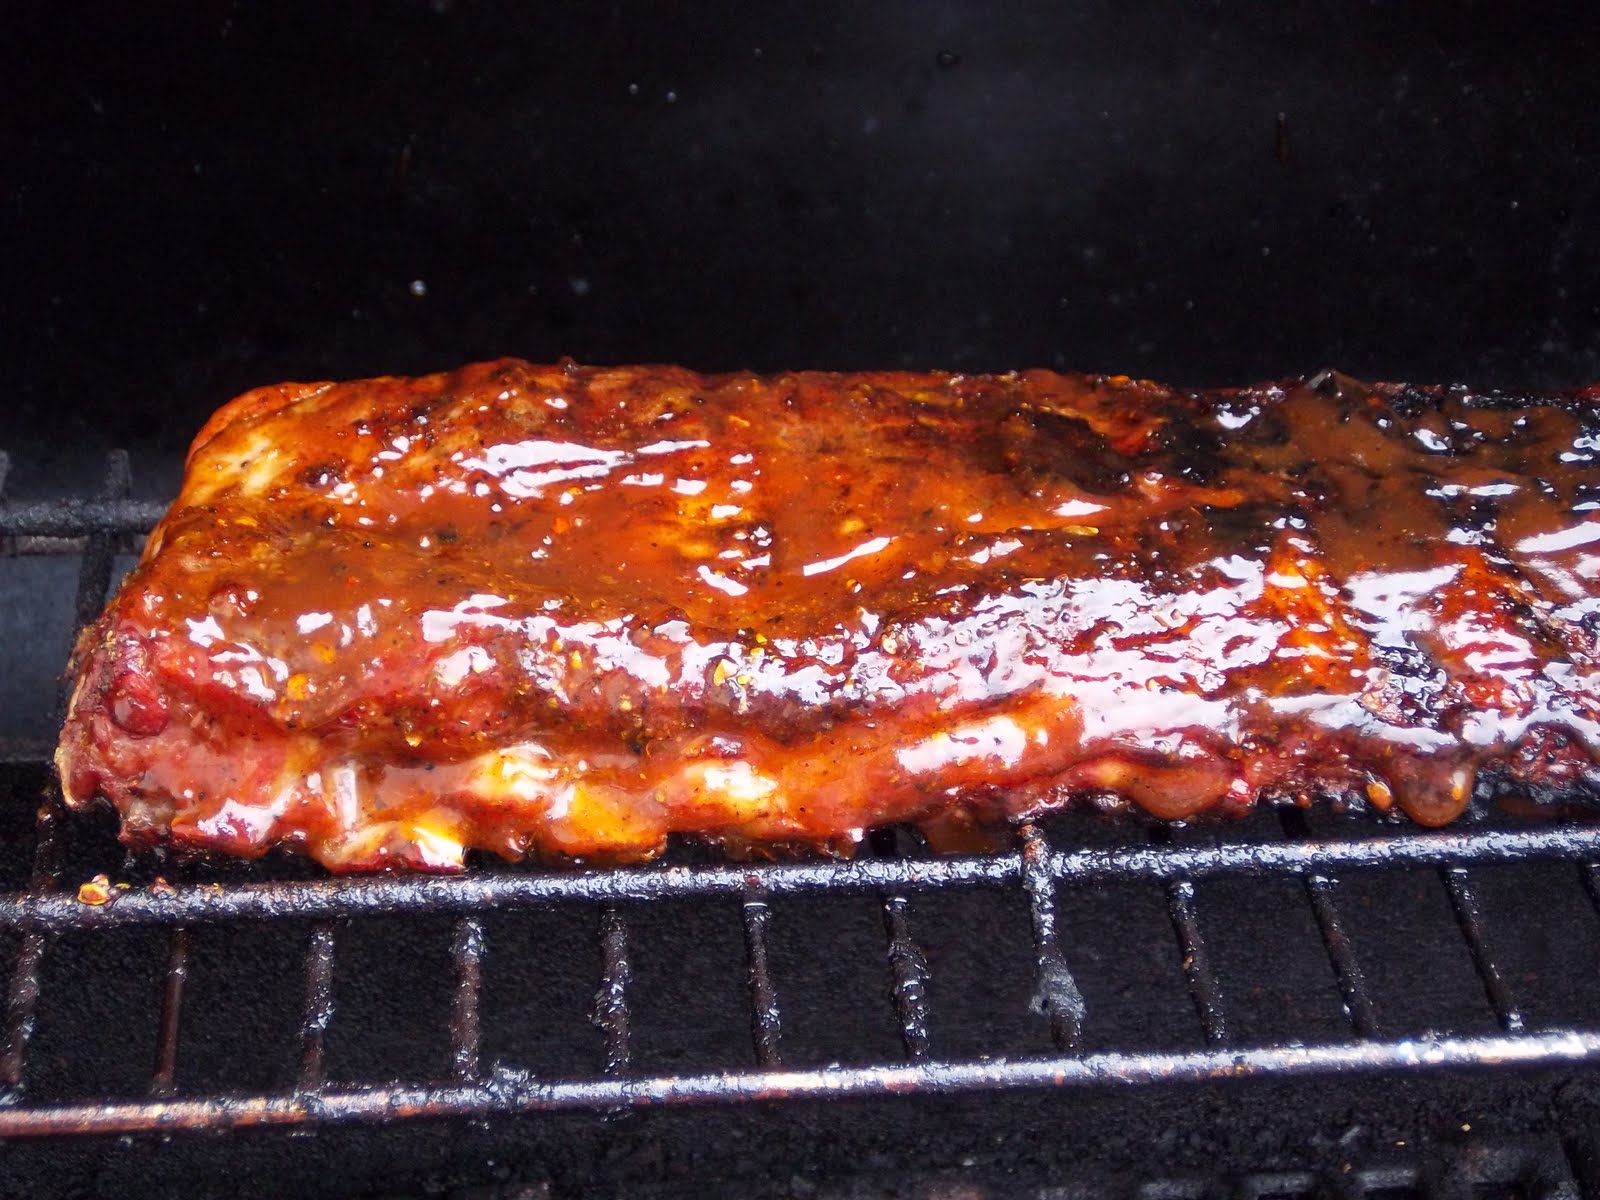
BBQ Pork Ribs on a Gas Grill
This summer though I have been coming out of my shell a bit. I have been experimenting with all sorts of foods this summer and have come up with some pretty amazing tasting meals.
So yesterday at the store, while on a hunt for a different dish I came across a rack of pork ribs. In my cart, the ribs went. As I drove home I consulted with my sister as to methods on cooking ribs. She instructed me to sear the rack on both sides and then cook it on low for about 45 minutes.
I also inquired about a friends recent post on facebook on her dry rib rub. I had never hear of such a thing. A dry rib rub? Okay!! She sent me the recipe that she used.
Then this afternoon, I did some quick searches on the Internet. I found lots of bewares for cooking ribs on gas grills. Most of the reading material warned about cooking your meat too fast and on too high of a heat. After some brainstorming, I was ready to put together my own rub and recipe for my ribs.
 |
| 1 tbsp paprika, 1 tbsp cumin, 2 tbsp chili powder |
 |
| 1 tsp dill, 1 tsp crushed red peppers, 1 tbsp garlic salt, 1 tbsp oregano, 1 tbsp pepper |
 |
| 1/4 cup brown sugar |
 |
| Place meat on cookie sheet. After mixing all ingredients together rub mixture on raw ribs. |
 |
| Set temp of grill to a medium heat and cook on both sides till brown. This rack was 2.33 lbs. It was a smaller rack of ribs so it only took about 7 minutes on each side. After browning both sides, place ribs on top rack in grill and keep grill at medium heat. Begin cooking bones side down. Cook for about 20-25 minutes. Turn when bone side begins to become slightly blackened. Flip the ribs meat side down and continue to cook on medium heat for about 20 minutes. 5-10 minutes on each side but turning the grill down to a low heat and still keeping on the top rack. When ribs are done, turn off the grill and let rest on the grill with lid closed for 10 minutes.    |
Curtins from Scratch
This has been an amazing summer so far. Since I have been blessed and was able to take the entire summer off from school I have had quite a bit of time on my hands. Painting the house with some new vibrant colors has been on my list of things to do. As I looked around my house all I saw was browns: beige, dark brown, light brown, taupe's and chocolate browns. I really think colors can influence your moods. After I got the living room painted my curtains did not do much for the brilliant yellow on the walls. I spent quite a lot of time looking for just the right curtains to compliment the wall color. When I found ones I liked I was certainly not going to pay the prices they were asking. Finally I decided I would make my own. Although fabric can be quite expensive I figured it would be cheaper than I would spend on already made curtains.
First step was to pull my sewing machine out of the basement. It's been years since I'd sewn and I was sure it'd be a bit rusty. Low and behold, what do you think I found in my box of crafting supplies that were with my machine....beautiful fabric that matched the walls. I was amazing. It was fabric that I must have bought at a goodwill years ago.
Next step was to design a simple pattern for my curtains. It took me some time to decided what type of curtain I wanted. I knew I didn't want anything that was frilly or feminine. I wanted plain and simple. I could not be happier. This is what I ended up with.


Monday, August 1, 2011
No Bake Oatmeal Nut Bars
These are amazing snack bars for all you mommies on the go. They're real mid-day energizers. This is my second batch of these. I have been playing with and tweaking the recipe. The first batch I added more of the semisweet chocolate. I thought they were pretty good. But my hubby said it was too much chocolate
I first used cooks.com for my guide for my own bars. I think that 6 cups of cereal is a bit too much.
You will need:
2 cups instant oatmeal1 cup Multi grain Cheerios (Any cereal would work. Maybe try Granola?)
1 cup creamy peanut butter
1 cup honey
1 cup brown sugar
3 tbsp semisweet Cocoa
1 tbsp vanilla
1 tsp cinnamon1 cup any kind of nuts
1 cup any kind of dried fruit
~ First mix the peanut butter, honey, brown sugar, vanilla, cinnamon and the semisweet chocolate in a sauce pan over medium heat. Keep a close eye on it. It cooks quickly.

~ Next while that is warming up on the stove combine in a bowl the oatmeal and cheerios.

~ Whatever nuts you decide to use, run a knife through them so they are about bite size.

~ Before the knife.....
I used a combination of almonds, raisins, peanuts, sunflower seeds, pumpkins seeds and cashews.
I used a combination of almonds, raisins, peanuts, sunflower seeds, pumpkins seeds and cashews.

~ After some chopping....
~ Combine the cereal mixture, the nuts and raisins and also the dried fruit. I used a premixed bag of cranberries, cherries, blueberries and strawberries.

~ Your wet ingredients on the stove should be just about done. It should look something like this...

~ Pour over dry ingredients in bowl and mix it all together. You have to use a pretty heavy duty spoon to combine everything.
 ~ Once you have it all mixed together, spray a large casserole dish with pan. Pour mixture into dish and press down firmly with wax paper. Put in fridge to cool for about an hour. Use a sharp knife to cut into squares.
~ Pour a large glass of milk and enjoy!

Subscribe to:
Posts (Atom)